Overview
The Radix Device Management Platform features the Views Console, which allows you to create a setup for a remote device so that it can be used as a specialized kiosk display. Whereas the Kiosk option limits a device to certain websites and applications, creating a View allows the devices in a group to display content from a specific URL that you provide. In addition, you can activate certain apps on the remote devices.
Creating a New View
When you click on the Views icon in the sidebar menu, the Views Console screen opens:

To create a new View:
1. Click on the Create New button.

The Create new view window opens.
The sidebar menu in the Create new view window consists of the following tabs:
| Icon | Description |
|---|---|
| Overview: Provides information on how many devices the View is presently being displayed | |
| Population: Allows you to specify which groups of devices will display the view | |
| Content: Allows you to select the content to be displayed in the View. | |
| Settings: Allows you to configure the settings on the remote devices that will display the View | |
| Whitelist: Allows you to select which apps can be accessed on the remote devices displaying the View | |
| Schedule: Allows you to schedule when to display the View |
We will go through the options in greater detail in the following tabs:
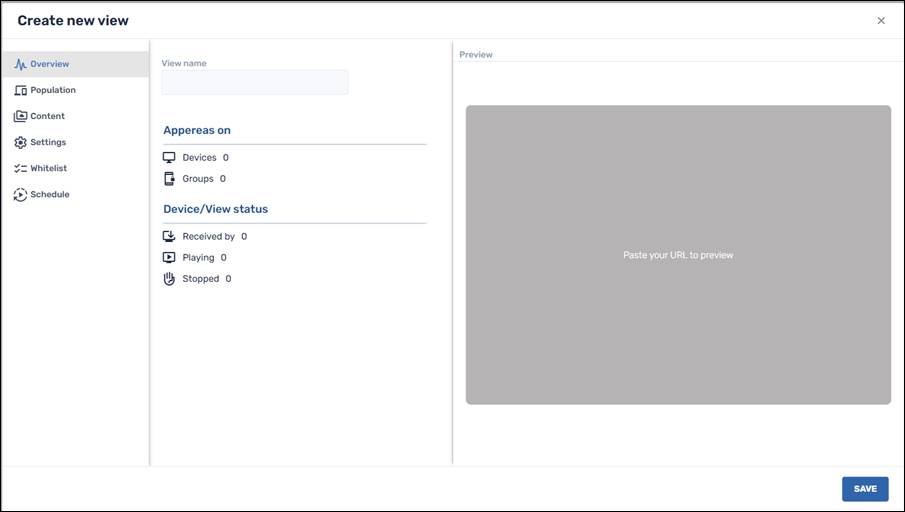
Overview Tab
When you click on Create new in the Views console, the Overview tab appears in the Create new view window. The Overview screen displays the statistics about which devices are showing a particular view.
To create a new view:
1. Assign a name to the view in the View name textbox.

2. If you click the checkbox Run with other templates, then this view will be given priority to run over other views that are associated with the same group.
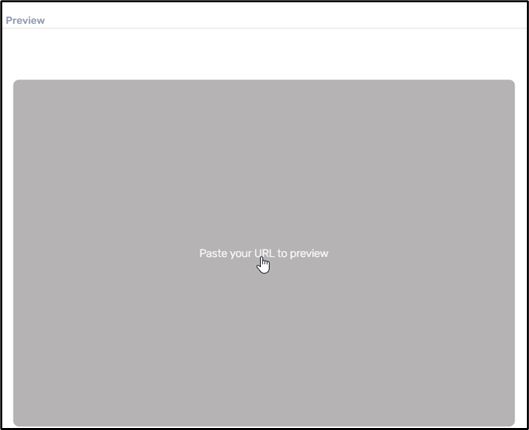
By clicking on the text “Paste your URL to preview” in the Preview screen, you will be redirected to the Content tab, where you can assign the URL to be displayed in the View.
The Content tab, which we discuss below, allows you to enter a dynamic URL:

Population Tab
1. Click on the Population tab in the sidebar menu. Here, you will associate the view with a group of devices. You can also add a filter to apply the View to only specific devices within a group.

2. Attach a group in the textbox to apply a view to a group of devices.
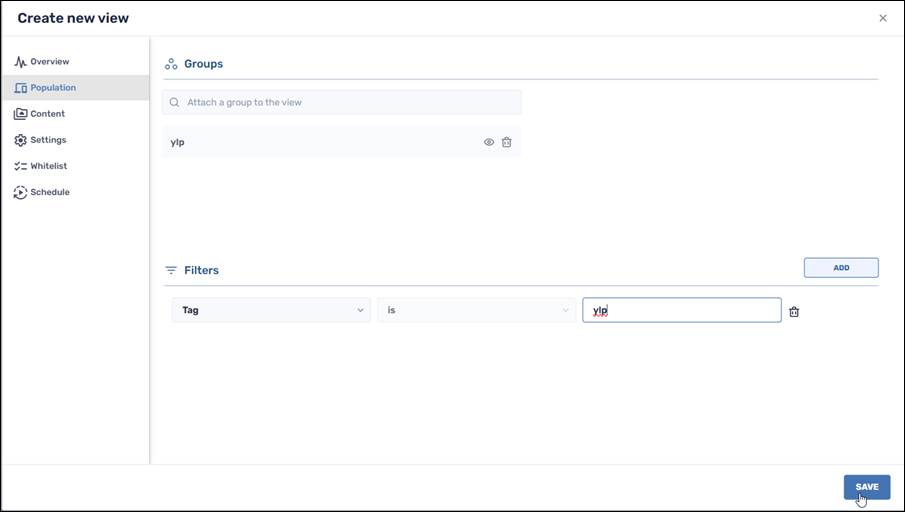
3. Click on the drop-down list in the Filters window to select filter conditions. You can apply several filters to narrow down the number of devices in the group to which the View will apply.

Content Tab
1. Click on the Content tab. You can either supply a URL or specify a software package to run on the devices in the group(s) associated with the View.

2. If you wish to use a URL for your View type, paste the URL in the textbox as follows:

This pane allows you to create a dynamic configuration by passing parameters through the URL.
To illustrate, a dynamic URL is of the form:
https://your domain/page?setting={setting:xx}&prop={prop:xx}&data={data:xx}
The parameters supported in this example are of the form:
- - System Settings: Settings options can include volume_ring, screen_off_timeout, or user_rotation.
The full list of Android settings options can be found at the website:
https://developer.android.com/reference/android/provider/Settings.System.
- - System Properties: The Properties options can include the device’s product brand or model. The properties can be seen in the Device Dashboard.
System Properties in the Radix Device Dashboard
- - Device Data: Data options can include the device’s Device ID in the Device Dashboard in the Radix MDM.
Practical Example of a Dynamic URL
As an example, here is a sample dynamic URL that will display a view on the Radix MDM:
Here is a table that explains the parameters in our sample URL:
| Parameter | Example |
|---|---|
| your-domain | itzikrb100.github.io |
| page | example-html-file/index |
| setting | {setting:screen_brightness} |
| property | {prop:ro.product.vendor.model} |
| data | {data:deviceid} |
8. If you select a software package to run on the devices in the group, click on Select Package to specify a software package to associate with the view.

9. You can either select an existing software package from the repository or click Add New in the lower left corner to add a new software package to the repository.

Settings Tab
1. Click on the Settings tab, and select the settings for your new view:

Here is a brief explanation of the options in the Settings tab:
Device orientation
Orientation
This allows you to select the orientation of the remote device’s display. The options are:
- - Auto: This allows the orientation of the device’s display of the View to adjust automatically, according to whether it is positioned in portrait or landscape mode.
- - Portrait: This displays the View in portrait form.

- - Landscape: This displays the View in landscape form.

Top status bar
The red status bar appears at the top of the View display. The options here are Show/Hide, to show the status bar at the top of the display, or to hide it.

Tablet displaying the red status bar (left) and without the status bar
Bottom navigation bar
The navigation bar appears at the bottom of the display, with Back, Home, and Stop buttons. Similarly, the options here are either Show/Hide.

Tablet displaying the bottom navigation bar (left) and without the navigation bar
Key mapping options
These settings let you determine the behavior of the Home and Back buttons on your tablet.
Home button
This determines the display’s response when tapping on the Home button, from among the three buttons on your Android display (or from the floating navigation buttons that we will examine later). The options are:
- - Bring Views content to the foreground: If you were running another app, tapping on the Home button would bring the View URL to the foreground.
- - Bring Views content to the foreground and refresh: This will bring the View URL to the foreground and start it running from the beginning.
- - Bring Views content to the foreground and go to Home page: This will bring the View to the foreground and display the URL that you have assigned to be the Home page.
Back button
This determines the display’s response when tapping on the Back button among the navigation buttons (either at the bottom of the display or in the floating navigation buttons). The options are:
- - Navigates back based on history: Tapping the Back button will take you to the previously viewed website in the user’s browsing history.
- - Back handled by the web app: Tapping the Back button will display the page determined by the web app running on the tablet, instead of going to the previously viewed webpage. (For example, you can introduce a piece of code into the web browser app, so that the Back button will display a personalized “Welcome” screen, rather than the previous webpage that the user viewed.)
Floating navigation buttons
This option will control the placement of additional navigation buttons that will be displayed on the View. This allows you to navigate through the URLs displayed on the remote device, even if you have disabled the navigation buttons that typically appear in an Android display.
In the example below, we specified that the floating navigation buttons be of medium size and positioned in the upper left of the display:

Floating navigation buttons in the upper left of the display
Visibility
The options include:
- - Hide, to not display the navigation buttons at all,
- - Show always, to display the navigation buttons at all times,
- - Hide when inactive, so that the navigation buttons appear when the user touches the display.

Large navigation buttons, positioned in the upper middle of the display
Accessing the Service menu
When a remote device is displaying a View, you typically won’t be able to access the icons for the apps on the device. However, you can temporarily pause the display of the View by accessing the Service Menu.
You can access the Service menu in one of two ways:
1. By pressing on the device’s Volume Up-Volume Down buttons repeatedly, or
2. By tapping on the display 5 times in quick succession.
The following menu appears:

Settings icons while running a View
It displays three icons:
Icon |
Description |
|---|---|
| Select a Wi-Fi network | |
| Select a Bluetooth device | |
| Kiosk settings |
If you choose to disable the display of the Wi-Fi and Bluetooth buttons, then when you access the Service Menu (either by clicking on the Volume Up-Volume Down buttons or tapping the screen 5 times) will only display the Settings icon.

Service menu with only the Kiosk settings icon visible
We will briefly describe the functionality of the buttons.
Wi-Fi Selector
The options in the Views Console are Enable/Disable. This will display or hide the Wi-Fi selector icon. Clicking on the Wi-Fi selector displays the following screen, showing all of the available Wi-Fi networks in the area:

Bluetooth Selector
The options in the Settings window are Enable/Disable, to show or hide the Bluetooth selector icon. Tapping the Bluetooth Selector icon will open a list of Bluetooth devices in your area:

If you click on the Kiosk Settings icon, it opens the following menu:

- - Start Kiosk Mode will resume the View.
- - Stop Kiosk Mode will stop the View and allow the remote device to revert to normal functionality.
Note: This will only stop the View for a few minutes. It will be enough to allow you to use the other apps on the remote device until it goes back to displaying the View. If you wish to stop the View entirely, see the page Stopping a View.
- - Configure Kiosk Mode will allow you to create a whitelist or blacklist of URLs and applications, and whether to allow installing apps on the remote device, and other device settings.

Policy builder tab
- - Set Password allows you to set the password to access the device settings screen
On the right side of the Settings pane, you will see the following options:

We will briefly discuss the options.
Power & Input Settings
This has a Keep on while playing button. When selected, the player and device display remain powered on as long as the View is playing. If not selected, the remote device will go into screen saver mode at the time designated in the device’s settings.
Offline configuration
This has a Work offline option. When selected, this option will allow the device to continue to display the View even if the remote device is offline.
Work offline
If you select to display a URL as your View, clicking this option will allow the device to continue to display the URL even if the remote device is offline.
Show offline message
When you check the Work offline checkbox, you will be able to prompt the user of the remote device that their device is presently offline, by sending them a message.

Creating a message to be displayed when a device is offline
When the remote device goes offline, the remote user will receive an alert containing the message you have specified:

Message displayed when the device is offline
Domain permissions
If you select this option, you will be able to specify whether specific domains can have permission to access your devices’ camera, microphone, and location information.

As an example, we will check the Microphone option for YouTube.
When we subsequently try to use the device’s microphone for a voice search, we receive the following notification:

If we leave the microphone option unchecked and then try to use the device’s microphone, we will be prompted to go to the device’s browser settings to allow use of the microphone:

You can add a number of valid domains and specify access parameters for each.
If you wish to delete the domain, click on the Delete icon on the row of that domain.
Whitelist Tab
1. Click on the Whitelist tab and select the apps that you wish to allow in the View.
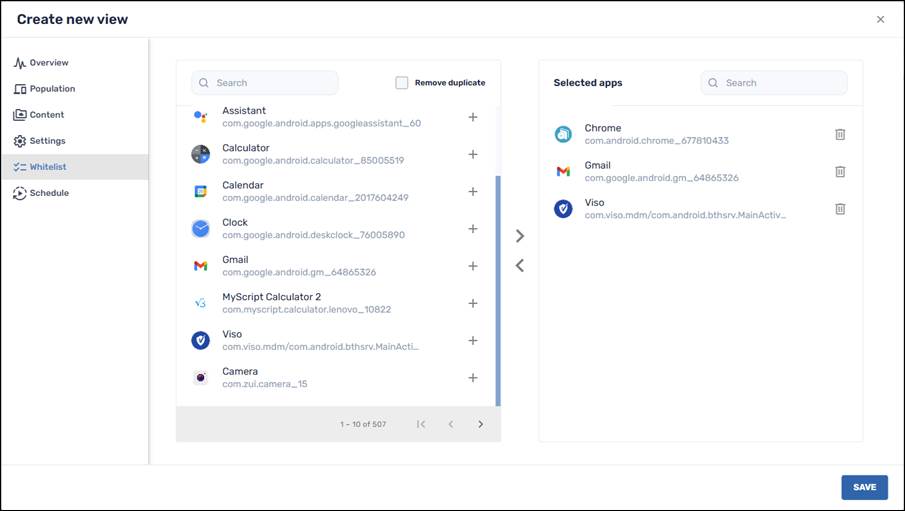
You can allow the user of the remote device to work with the selected apps via the Radix Device Management Platform, from the device’s Device Dashboard.
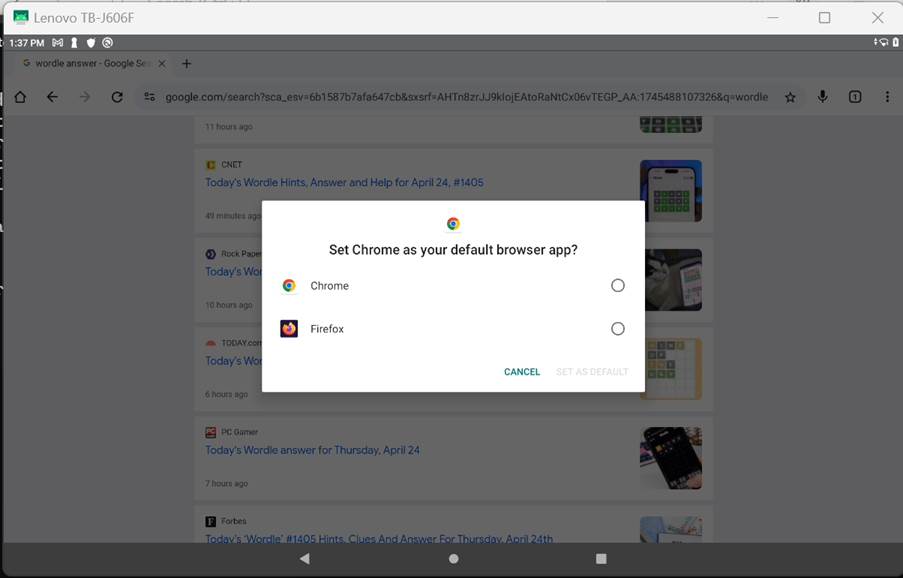
Running an App Remotely
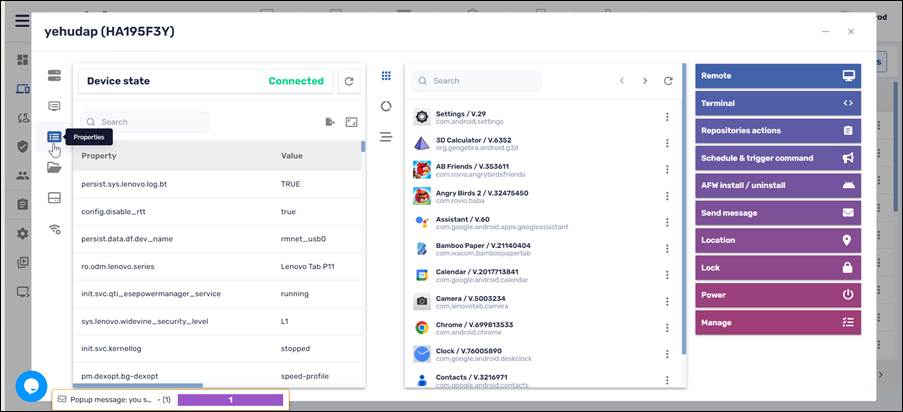
As an example, one of the selected apps in our whitelist is the Chrome browser app. We will run Chrome on a device presently displaying the View. In our example, we will run Chrome on the device with Device ID “HA195F3Y”.
1. Click on the Devices icon in the sidebar menu to open the Devices Table.

2. Find the specific device in the Radix Device Management Platform, in the Devices Table.

3. Click anywhere on the row of the device to open its Device Dashboard.

Device Dashboard of Device HA195F3Y
4. The middle pane has a list of apps currently running on the device. Find the Chrome app in the list and click on its three-dot menu.

5. Click on the Start app tile to run the Chrome app. The View will stop running, and the remote user will be able to use the Chrome app instead.
6. If the remote user presses the Back, Home, or Stop buttons on their device, the device will revert to displaying the View.
Schedule Tab
1. Click on the Schedule tab and set when you want the view to be executed. The options are:
- - Immediate: To execute the view as soon as the device gets the profile.
- - Over a time frame: To execute the view over a time interval, where you assign the start and end time.

2. Click Save to save the parameters for the View. It will now appear in the list of views.

The view we have created ("rbp experiment") appears at the top of the list