Overview
There are 3 options for enrolling a Windows device in the Radix Device Management Platform. You can either download and install the executable file for the Viso Agent app, have the Viso Agent app preinstalled on your Windows device, or install it via the command line.
Method One: Manual Installation
1. Click on the Devices icon in the sidebar menu of the Radix Device Management Platform to open the Devices Table.

2. In the Devices Table, click on Add Device in the upper right corner.

3. In the Enroll pane that opens, click on the Windows option in the sidebar menu. You will receive detailed instructions about the account name and server address that you will need to enroll the device properly.

4. Click on the link Download our Windows agent directly to get the executable file to install the VISO agen

5. Run the Viso Agent app setup executable file and follow the installation wizard. The following screen will appear.
6. Type in the correct Account name or Domain name, depending on your MDM agent version (for example, “qa”), and click Next. (Here is an explanatory video.)
7. You will be prompted to supply identifying tags for your Windows device. These tags will help you sort, filter, and group your device with other devices in your fleet.
8. Supply an identifying tag for your Windows device and click Next. You can always add or remove tags later in the Radix Device Management Platform.
9. You may also supply a password to limit access to the Viso Agent app on your Windows device. You will have to enter the password whenever you activate the Viso Agent app to make modifications.
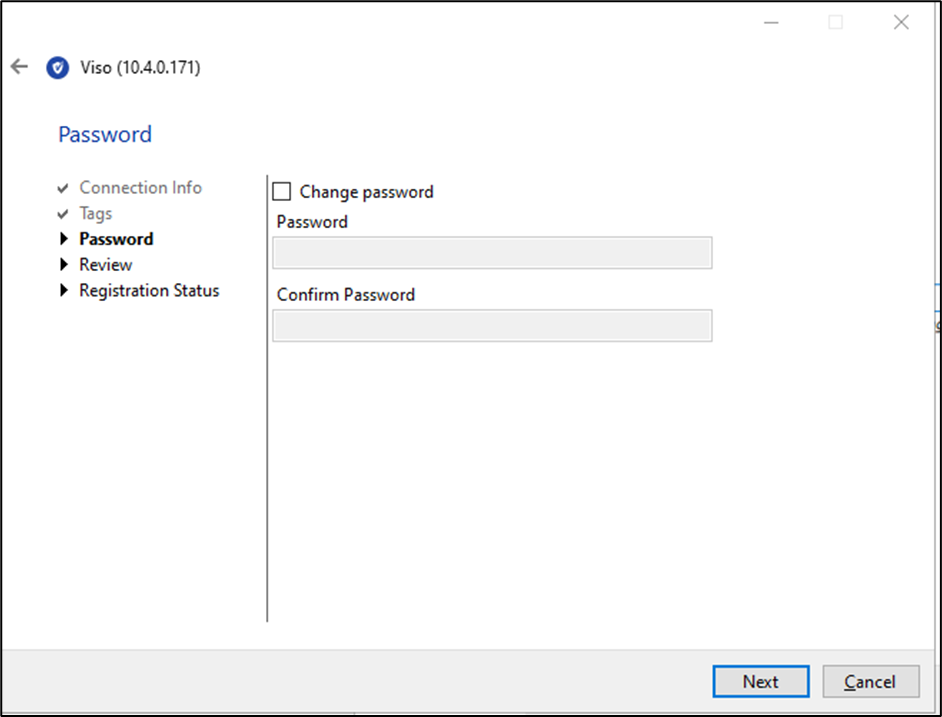
10. You will then be prompted to review the account information. If everything is in order, click Next.
11. You will then receive confirmation that you have registered successfully.
The Windows device will now appear among the list of devices in the Radix Device Management Platform. However, we will need the Device ID to find it in the Devices Table.
To know the Device ID for the newly enrolled Windows device:
1. Go to Start and click on Viso Agent ID in the pop-up menu.

The following window will appear, displaying your Windows device’s Device ID:

2. Type the Device ID in the search bar. The device will appear in the Devices Table.

Method Two: Radix agent pre-loaded on your device
There is the option to have our Viso Agent app preinstalled on your firmware. To enroll your Windows device, you must supply the domain name.
1. Look for the Radix VISO MDM client on your device.
2. Follow the installation wizard. When getting to the “Account name” or “Domain name” (they are identical), depending on the agent version section, make sure that you enter the name as registered (see the explanatory video).
3. Follow the wizard through and finish the enrollment.
You will then get a notification that the installation has been completed, as
above.
Method Three: Installation Using the Command Line
You can install the Viso Agent app using command line arguments as well, with all parameters pre-set, and enroll a Windows device in this manner.
Do not add the parameters of an item for which you wish to remain with the default settings.
* Indicates that the command is mandatory.
Viso Agent Settings
| Setting | Purpose |
| /server_uri= | Set the server uri. |
| * /group | Set the “account name” or “domain” tag. |
| /tags= | Set the client’s tags (separated by commas “,”). |
| /pwd= | Set the wizard administration password. |
| /currentpwd= | The current wizard administrator password. (Use when the application is already installed) |
| /dontrunafterinstall | Don’t run the Viso service after the install in finished. |
Setup Command Line Parameters (partial list)
| Parameter | Purpose |
| /silent | Display only the installation progress window. |
| /verysilent | Do not display any setup window (No UI) |
| /norestart | Don’t restart the PC when the installation is complete |
Further Information
In case you require further assistance, we encourage you to visit our customer support page.