Overview
The Kiosk command limits a device to a particular list of apps and websites. This is perfect for using a device as a display in a kiosk or information booth, as in a storefront, shopping mall, or hotel.
Summary of App Launching Options
When you allow certain apps to run in a Kiosk option, you can choose between one of two app launching options:
- – Launch first: This will launch the selected app upon every restart/boot/startup. Once you close that app, you will see the icon for that app on the Home page on the tablet with all the other apps.
- – Launcher app: This will prioritize an app as a “launcher app”. This launches the selected app as soon as you send the Kiosk command to the remote device. Assigning an app to Launcher app status will effectively lock the device into running only that app. The Home, Back, and Recent Apps buttons on the remote device will essentially be inoperative. The device will automatically always revert to the app selected to be the Launcher app.
Note: You can only assign one of the selected apps to be in Launch first or Launcher app status. But, by means of this option, you can choose to prioritize one app at a certain time and then prioritize a different app to appear upon launching at another time.
In addition, there are two more icons next to each app: Hide icon and Delete.
- - Hide icon: This removes the app's icon from the display on the remote device.
- - Delete: This deletes the app from the "Selected apps" list.
Illustrating App Launching Options
By way of illustration, let us create a Kiosk option with a few allowed apps:
1. In the Radix Device Management Platform, click on Configuration>Kiosk Modes:

2. In the Kiosk Repository window, we select Add New.
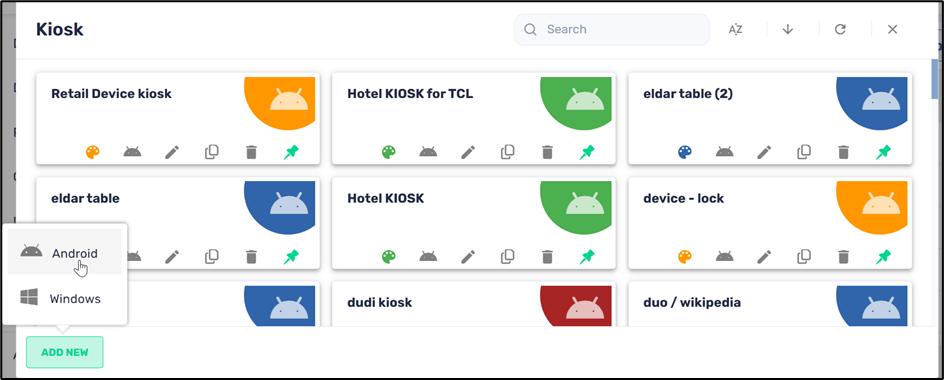
3. We select the Android option to create a new Android kiosk and supply a name and description.

4. We click on the Allow list icon in the sidebar menu and choose a few apps that we want in our Kiosk device.

5. In the Web tab, we can select URLs of websites to either allow or block in our Kiosk.

6. In the General tab, we select the font size and color, and the size of the icons in our kiosk display. We also added a wallpaper for the kiosk.

When executed, the Kiosk appears like this:

Applying the Launch First Option
1. To use the Launch First option, we go back to the Kiosk item that we created, and go to the Allow list of allowed apps:

2. We click on the Launch first option on the Firefox app.

3. We click Confirm and then apply the Kiosk option to our remote device. The Chrome app will run automatically:

Note the three buttons at the bottom of the Android display. They are:
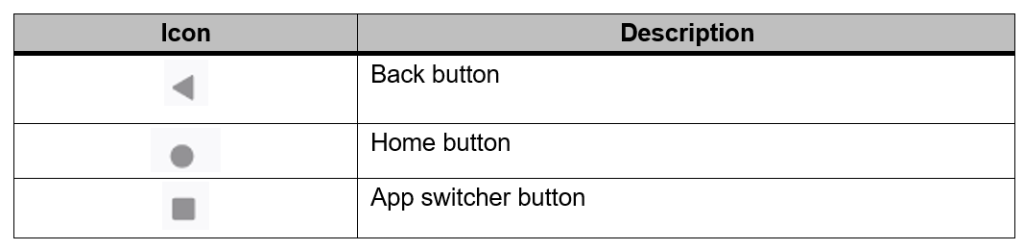
When we are in Launch App mode, we have full access to all of the other apps by means of these three buttons:
- The Back button will get us to our previous page in the Firefox app.
- The Home button will get us to the opening screen of the Kiosk, with the 4 app icons.
- The App Switcher button will allow us to choose other open applications.

Applying the Launcher App Option
1. To use the Launcher App option, we go back to the Kiosk item that we created and go to the Allow list of allowed apps.

2. We click on the Launcher App option on the Google Play Store app and click Confirm:

3. When we apply the Kiosk option to our remote device, the Google Play Store app appears on the display:

The Back button, Home button, and Display all apps buttons will essentially be inactive. This locks the device in the Google Play Store app.
Applying the Hide Icon Option
There is a Hide Icon option, which removes the app’s icon from the display on the remote device. This prevents the remote user from opening the app until you choose to show the icon on the display at a later time.
As an example, we will hide the icon for the YouTube app:

When we look at the display once again, we will see that the YouTube app does not appear anymore.
